Wednesday, December 22, 2010

A Blog to Watch...

I enjoy looking at other people's blogs to see their artwork, and often peruse my favorite painting blogs, hoping for something new to share with you. Today I found a blog that I'm sure will be of continuing interest.


Several of my online friends are included there: Ralph Parker (who works in gouache), Ron Guthrie and David Simons, Susan Smolensky and Rick Reinert, all of whom are acquaintances of mine from the WetCanvas Landscape Forum.

I'm impressed with the technical excellence shown in this group, yet the diversity of styles and subject matter.  As you can see from the above screen shot taken from their front page today, you'll get some variety there. As students of art, we can learn from one another's art! I'm looking forward to watching this blog on my favorites... I hope you enjoy it, too.

And in a few weeks we'll all settle back into the routine of weekly classes.  


Please let me know if you plan to attend some or all of the classes in our next session. 


I suspect you may be planning to come but haven't let me know yet in all the hustle-bustle of the season. If you'll most likely be there for four or more classes, I'd appreciate knowing!

Wednesday, December 8, 2010

New Class Session Begins January 13--Join Us!

Time to make some plans for the new year. I sure hope you'll join us for the next eight week session. I have some great new teaching ideas and plans, focusing us a bit more on composition and how to create a painting that's expressive, personal and successful.

Our next session will be January 13 to March 3, 2011 at the same time and location as always--11:30-2:30, on Thursdays at Paradise Hills Methodist Church in Albuquerque. The cost of the eight-week class remains $200.00. Please click on the Upcoming Classes page, above, for further class policies.

Below is the class plan. Details regarding each class will be posted on this blog sometime during the day on  Monday, including the plan for the coming class and any materials you might want to consider bringing, so that you can be prepared to get the most out of it. 


I'll discuss the details as we approach the class, but I'm going to change the structure of the class a little this session. As usual, we’ll meet to set up at 11:00, and at 11:30 I’ll do a mini-critique of one WIP (work in progress) from each student, specifically meant to review what was covered in the previous class. At approximately one half hour before closing we’ll gather again at my easel with questions and further discussion when it will be beneficial.


Class Schedule
January 13 to March 3, 2011

Class 1— Jan. 13 – Emulation
If you could paint like another artist, who would it be? I’ll share with you the work of artists I admire and show you why I believe their paintings are successful, pointing out specific art elements. I want you to decide where your overall work needs to improve and search for artwork that does well what you need to improve on. Please bring photographs of two such paintings by any artist, done at any time. We’ll copy—but with a twist.

Class 2— Jan. 20 – Repaint It
Bring one of your paintings today that you feel came close but just didn’t quite make it. My challenge is to repaint it, but instead of painting with your usual medium I want you to change media. I believe that this will enhance the process you use in your more accustomed medium. We’ll begin with a short group critique of the painting to help you decide what needs to be done. When completed we’ll look at the two paintings side-by-side.

Class 3— Jan. 27 – The Value of Value
Today we’ll use no color at all, only black, white and gray. You can paint in pastels, use black and white paint, or draw using pencil, charcoal or whatever media you like—but no color. I’ll share work that exemplifies the critical role value plays in composition, as well as supplying three different photographs you will use as inspiration.  

Class 4— Feb. 3 – Vloothuis's “No-fly” Zone
We’ll explore the effects of peripheral vision on all paintings, applying the concept of the “no-fly” zone to composing. Please bring one or more of your unframed paintings, finished or unfinished, to examine for this critical means of looking at composing. The studio portion of this class is open to WIP.

Class 5— Feb. 10 – Evergreen Trees
I’ll email several photographs to you ahead of time so you can play with them—drawing, recomposing on the computer, or doing notan/ thumbnails—but you’ll paint in class after seeing a demonstration showing you some of the key elements you need to consider. The idea is to use the “rules” but customize things, enhancing the painting in your own way.

Class 6— Feb. 17 – Snow: White Without White
How can you paint colorful whites? Don’t use any white! I challenge you to paint from a photograph I’ll provide. Bring a piece of virgin white paper, any size or format, and a clean palette.  We’ll discuss how colorful snow (or any white subject) really can be.

Class 7— Feb. 24 – Abstract Landscape Painting: Robert Genn
In this first class of its kind for us, we’ll be inspired by the paintings of well-known Canadian painter Robert Genn, who has a knack for distilling the landscape. He is perhaps best known for his work on (Canada’s) West Coast and in the Rocky Mountains. His technique includes a tradition of strong design using patterns of color and form, with a pervasive sense of personal style. Come prepared to paint any WIP (work in progress) after this presentation and discussion.

Class 8— Mar. 3 - Final Critique and Class Potluck
We’ll do an in-depth crit of the paintings done in this class or anything you’re working on outside of class. Food and fun!


Monday, November 22, 2010

Class 8— November 18—Final Critique and Class Potluck

Sidewalk Fall, gouache on Somerset Black Velvet, 4" x 5.5"

I missed the critique this session because of my mother's final illness and death, but my wonderful students went ahead and held the potluck and a group critique! What a great bunch you are. Thank you so much, from the bottom of my heart.

I've posted a painting of my mother and aunt on my Art and Faith blog. Some of my students will recall Mom taking classes a few years back. She visited the class critique last year, enjoying the camaraderie and food. She never failed to ask me how the class went each Thursday, and inquired if there were people she knew there, too. 

We plan a gathering next Tuesday, November 30, to celebrate her life. I'll send out details in a day or two. If you knew Mom, I'd love to hear your memory. Thanks.

Details on the January class are on hold for a while, as we sort out some things.

Meanwhile, keep on painting!

Deborah

Friday, November 12, 2010

Asymmetrical Square class results

Pastel, on buttercup yellow Pastelmat, 7x7"
This was an interesting class, building on classes we've done before devoted to square paintings, but taking us a bit farther along in understanding asymmetrical balance. Above is my painting, not really done as a demonstration but painted during the class time.


This photo, taken from Google Street View, shows you the static and dynamic balance of symmetry versus asymmetry. In the first composition, I placed the division of land and sky directly astride the horizontal center line and the road on the vertical center line. There is almost no variation from right to left sides. The sky has little color, value or shape variation, as most of the clouds are horizontal.

In the second photo I simply rearranged the elements so that none of the major shapes land astride the center or one-third axis lines (see illustration.) The shapes of the foreground triangles are all much more dynamic, and the clouds arc in a gentle circular motion that leads the eye back into the center of the piece.

The challenge was to try to compose a painting where the major shapes avoided these too-static axis lines, and utilized more dynamic balance--without allowing the eye to slide off the page anywhere, of course. I saw some wonderful work beginning in class that I'd love to share with you.

Barbara Clark, oil on black gessoed panel
Kris Gorman, pastel on Wallis paper
Barbara Funke, pastel on Wallis paper
Diana Stauffer, oil on panel

I can't wait to see how these look when they're finished.

Looking good. Keep going, gang!
Deborah

Monday, November 8, 2010

Class 7— November 11— Asymmetrical Square


The directional thrust of a square painting is challenging, so today we’ll look at how to make an asymmetrical composition in a square piece. You’re welcome to work from life, if that helps you, or find a photo that you can recompose into a square composition. 

What is asymmetry? The 'a' at the beginning means 'not', thus asymmetry is not symmetrical. Symmetrical means balanced, a mirror image that is identical on each side, thus asymmetrical literally means "not balanced", but in art terms it indicates a composition that has achieved balance without using identical elements on each side. 

The easiest picture is the see-saw. 


Just as the larger person on the see-saw has to move closer to the center to achieve balance, so in composing you find that larger and smaller elements must be arranged carefully to achieve that same balance. Often the larger elements need to move nearer the center, too--but there is no formula! 

What I want us to play with at this class is the idea of using some simple elements in the square format to achieve a balanced composition that's interesting. This requires you to do some planning. Look over these paintings and choose the ones you feel are most balanced, asking yourself why you think they work or don't work. Are any of them symmetrical? Any asymmetrical? In other words, do you sense the balance, despite the fact that the composition is not equal top and bottom, or side to side?  Which ones have rhythm, yet keep your eye from going off the page anywhere?


Now here they are in grayscale reduced to poster shapes. Analyze the simple shapes, their relative size and what you think is effective from the standpoint of the underlying abstraction.  


In class we'll discuss the compositional elements, their weight, balance and movement, exploring what is working and why, plus you'll carefully compose from life or recompose your photos. 

One other tool you might like to have is this grid. Feel free to copy and print it out, or take a square piece of paper and fold it in thirds, then in half both ways, and from corner to corner both ways. This grid will give you some key intersections to pay attention to as you compose.


To bring:
  • A square sheet to paint on, perhaps more than one, if you want to experiment. Any color is fine. 
  • Find some objects, if you enjoy painting from life, or bring a photo or photos that you can compose into a square format, if not square already. Recomposing will be part of what we explore.
  • The grid.
  • Last week's painting.

See you at class on Thursday.

Deborah

Thursday, November 4, 2010

Lost and Found class results

I saw some wonderful work starting to happen today at class. My demo was done in gouache, working upright on the easel, which I don't do at home. It felt fairly awkward! I didn't finish but I think it showed the basics of massing values and finding or losing edges. Everyone wanted to see how I would paint that wire whisk, so I threw it in there using a few strokes and painting the negative shapes.

gouache, 9x7"
The most important thing to keep in mind when doing this kind of a study is to mass values. We started with some sketches like these:


Then my talented students launched out using all kinds of objects, looking at the shadows, overlapping things, seeing the hard edges and looking for the soft transitions. We massed a lotta values today, and played with paint and pastels.


Above, Catherine found the afternoon sunlight inspiring. I wish I had gotten a shot of the painting near the end of the class! Beautiful colors...

And this one is Barbara Clark's pastel, early in the process, showing the persimmons and lime she used, as well as the stage.

And here is a later shot, still not finished, but quite striking:


I worked on another piece, just to keep the brushes wet. You can see the leaf on black paper and my painting on Somerset Black Velvet paper. It's still unfinished, and was wet when I shot this:


It was a fun day, taking a few into new realms of drawing and painting the still life.

Good work, gang! Keep going...
Deborah

Monday, November 1, 2010

Class 6— November 4— Lost and Found


Edges are compelling! Today we’ll work from life, drawing and painting some simple objects that overlap one another. We’ll use “lost and found” edges to sculpt space and move the eye through the composition. Bring three small objects and a background for them, your sketchbook and drawing tools. 

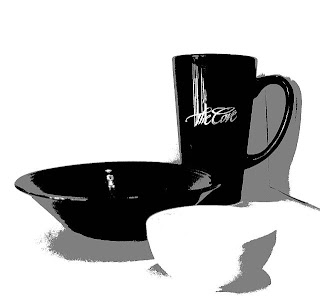
I really recommend keeping the objects simple, so that you aren't trapped into painting something shiny, reflective, see-through, or overly complex, which will distract you from the issue at hand. For instance, let me show you some photos and help you see what might work, and what could be distracting, depending on your experience. I DO NOT want you to work from photos, but from the real-life objects on the table in front of you, so don't let my photos confuse you!  

This is too complex:


The shiny bowl is complex with all its reflective surfaces. The glass is more complex, not only because of the the reflections but because of the distortion it causes. The front object (a salt shaker) has a complex pattern that distracts from its shape. 

This one is better because the simple colors, shapes and contrasts let you see the objects and their relationships:


And this one is good because the wood is flat and non-reflective, and the objects are simple, understandable (but fun) shapes:


I want you to bring some kind of a background to put your objects against, such as this:


I had a box that worked, but you could tape together two pieces of cardboard or mat board. The paper is taken from the ad section of the newspaper--cheap, large, convenient--but you can use anything.  Keep it simple (you can use colored paper, if you like.)


NOT draped fabric, or anything printed or complex, such as this:


What we'll be looking for are edges, those places where objects overlap and form one large shape of the same or similar value. I want you to squint like crazy to see these soft and hard, lost and found edges in and among your three objects, so it really will pay to keep it simple.  (I posterized these in Photoshop to show you the value shapes--but you will do this visually in the classroom!)


If you've painted a lot of still lifes and are competent at doing complex objects, have at it. Otherwise... KISS (keep it simple, sweetheart.)

This list of what to bring:
  • last week's palette shift paintings to show
  • three small objects 
  • a background 
  • your sketchbook and drawing tools
See you on Thursday,
Deborah

Thursday, October 28, 2010

MY BOOK reprise...

I just wanted to leave a note here letting you all know that I posted a link to the book, Gouache Paintings in Small Scale, in the left-hand sidebar. You should be able to click on it and go to the order page easily. We discovered that you have to put in the amount first, then click Add to Cart.

You can now get priority shipping at the same cost as regular shipping, so you can hold this little book in your hands in 5 days, they say. I hope you enjoy it.

Deborah

Palette Shift class results


Today's class turned out to be really fun and instructive! We made three little sketch-paintings, the same size and on the same paper, one in grayscale, one from the original photograph and one that shifted the palette slightly. Above is a snapshot of the three 6x6" paintings I did in class today. They're on UART400, a paper I'm really enjoying.

Here's my original photograph and a grayscale copy of it.


I think it's a good idea to paint grayscale sketches from color photos. It can be instructive to compare a grayscale photo to your grayscale painting after you paint it. The skill of translating color to value is irreplaceable, I think, and derived from practice recording values the way you do it on location.

To paint the second one, I selected a palette of 10-20 sticks using my color wheel. That way I limited what I was using and didn't start to throw in the kitchen sink. It's primarily a blue-orange-green palette.

I also selected a palette for the third one, this time looking at the photo and the color wheel, and shifting all the colors. I like the adventurous quality of the color.

You can play with little color sketch plans like these to see what works and analyze the values and colors, learn how to make things harmonize differently, and challenge yourself to learn more about color relationships. I might use a combination of colors from both of these color pieces to make a third one, and then start to refine my color decisions before finally painting a version that is, say, 18x18" in size. I wouldn't pre-select the entire palette of colors when I do the larger piece, because by then I don't have to. I really know where I'm heading and can freely interpret the color as I paint. Oddly enough, planning results in freedom!

Here are a couple of paintings done by my talented students:

Nancy's first one

Nancy's second one

Kris's two paintings

Great job! Keep going, gang!
Deborah

Tuesday, October 26, 2010

Class 5— October 28 — Palette Shift


A subtle shift in color can make a difference in mood, energy and place, so at this class we’re going to do three small (4x6” to 6x9”) paintings, one in grayscale and two others with a limited color scheme. We’ll slightly shift the palette and see the beauty of using subtle varieties of colors for each one. 

I want you to find a photograph that invites a harmonic color scheme, perhaps one that has a majority of one color, such as warm pinks and violets at sunset, or a blue lake and mountain reflections. Be sure it has a dynamic range of values, too, with some strong contrasting dark and light colors.  Bring your color wheel with you to class, as well as three pieces of paper or canvas that are all the same size. 

Analyze your photograph and select the single most important color in it. For instance, in this photograph, choose the color you think is the key color. Spend time analyzing which color you believe is most influential. There is no right answer, it's up to you as the artist, but I think you can see that there is a definite color bias.


Then I want you to take a few minutes to look at this wonderful online tool, called THE GAMUT MASK. It's not absolutely necessary to do this for our class on Thursday, but I've found it very interesting and thought provoking. If you're using pastels you won't be mixing colors, but you can select a harmonious palette that you can then shift slightly one direction or the other on the palette. Play around with it, if you like, to see how a subtle shift in color can affect things. Use that predominant color and find the gamut of colors you want to use in your little paintings. 

For instance, here are two color schemes I might use, the first based on what I see in the original photo, and the second a much more purple-orange version of it. 


In class we'll do a much more traditional approach. We'll make a quick grayscale painting from the photograph, finding the values. This need not be a detailed painting, only a rendition to help you see the values. It's helpful to bring a grayscale version of the photo:


You can use a range of gray pastels, or black and white paint. The idea is to find those values, assign a set of colors to use (inspired by the original color photo--the first palette) and paint a small version of that, and then shift the palette (the second one) and paint it again, this time from the grayscale painting. All three paintings should be on the same surface, painted the same size, but any kind of paper is fine with me. I think white or neutral toned paper or canvas will be best.

This is a fun and demanding exercise, so come prepared to dig in and really think about COLOR!!

Also bring last week's paintings to show, as always. I'll be curious to know how you did with a complex background. 

See you on Thursday,
Deborah

Sunday, October 24, 2010

Complexity class results


The demonstration painting, shown above, was the result of about an hour's work to show the class how to interpret a very intricate and complex background. The key element to a successful background is that it must support the subject of the painting effectively, without unduly drawing the eye, functioning to move the eye to the subject. To do this you have to use a combination of techniques, among them patterning the light and dark, and repeating the characteristic shapes, colors or textures found there.

Remember that there are five elements you must manipulate to achieve the illusion of depth: cooler color, lighter value, less detail, softer edges, less contrast. It's probably be best to begin with a ground color that is the general value of the subject you’re painting, or very nearly so. Neutral colors are easier to work against, but saturated color can be visually exciting. The value of the color is more important than its intensity. Choose carefully.I chose a cool gray in a medium-dark value for my demonstration painting.

I find it’s easier to lay down the sky color, when its seen, before beginning any elements that reside against it. An underdrawing in soft charcoal can determine the areas where the sky will obtrude into the snarl of trees, for instance. I suggest using a thicker application of sky color in openings and a very, very light color application, perhaps a shade darker than the open sky, where branches will lie against it.


Examine a snarl of close branches behind the subject of the painting, such as a forest might present. Notice that you can sort out areas where the growth is denser, perhaps larger branches or trunks, and places where the crisscrossed branches are lighter in color, value and amount. Squint your eyes to see, not the actual branches but the impression of them created by values. Rather than trying to paint every branch, which is overwhelming, begin with the larger areas of darks (which may only be medium in value, depending on the scene), and lay them in over the sky color using the flat of your pastel stick. Use lighter strokes and lighter colors where the branches thin, thinking of areas of value, NOT branches. Thick and thin, medium to light, no matter what the value begin with the flat side of your pastel, not the point.


If you find thick trees immediately behind your subject, analyze the large light and dark areas of value that create the impression of a wooded hillside or tree-covered slope. The distant trees may not be tremendously different looking than the closer tree, especially in a photo, but remember that if you were there standing on site looking at them you would be able to see the effect of air, whether the camera catches this or not. So decide how far the trees are from the subject, or whatever is behind it, and keep them uniform at the same distance. For instance, let’s say you have background trees on the left side and the right side, with some farther away in the middle. Those trees that line up, despite being on different sides, must appear to have the same amount of detail along the edges, be the same color and value, and have the same amount of light and dark to look uniformly distant. The farther grove of trees will of course have less of all these elements.

Patterning can be a huge part of this illusion. Squint like crazy to see this. Record the repeated patterns you see with an area of value, forsaking any kind of descriptive detail. Think in terms of value, using shapes of light and dark, the repeated line or stroke that’s most characteristic, and then color.


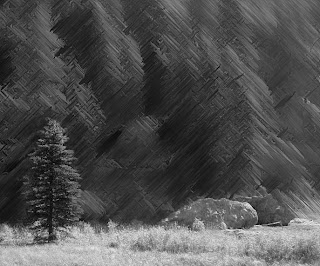
Blur or manipulate the photograph to help you see the complex background subjectively rather than objectively. I often use Photoshop to blur and crosshatch the background area behind my subject matter, in order to be able to analyze the shapes and values. Sometimes I reduce the color or saturation, as that can be distracting, but sometimes I don’t. I will also sit down and do a pencil drawing of the subject, on a separate sheet of paper (not as an underdrawing, that is), which forces me to see the complex background as an area of values patterned with light and dark.

Use whatever helps you to mass the areas of complexity into shapes and values, and then select effective colors. It’s most advisable to paint this area that's behind previous to painting the subject in front of it, although small adjustments are possible and often necessary. Just think logically about the complex ground—you can’t really paint all the teensy branches and leaves well, nor should you need to. It’s like haiku poetry, suggesting enough to satisfy the mind of your viewer and let them enjoy looking at the subject.


Here's another painting of mine, done long ago, that illustrates how to simplify the background. There were a lot of trees and brush in the photograph, but they have become patterns of light, medium and dark values that suggest all kinds of things to the viewer. 

I also shared my new gouache book, Small Scale Paintings in Gouache, with the class. I'm so thrilled with this little book. It has 68 of my 2.5" x 3.5" paintings in it, three step-by-step demonstrations, and a little about my history, including a portion of the article published in Watercolor Artist last February.


It's easy to preview and buy it, if anyone is interested. Here's the Blurb page where you can see all the details. Be sure to click on the little View Screen square in the lower right-hand corner when you get there to enlarge the image to fill your monitor.  Blurb ships to many countries. Check here to see if they ship to your area.

Keep going, gang!
Deborah

Monday, October 18, 2010

Class 4— October 21— Complexity Behind it All

San Carlos, pastel, 12" x 12"
At this class I’m going to try to help you see and understand better how to approach a complex background that resides behind your subject matter by patterning light and dark, as well as identifying and repeating shapes, colors and textures. Your photo should have something like a tangled forest or textured hillside overlapped by the subject matter in front of it.

Look for a photograph something like this:


I often take my photos into Photoshop to manipulate them. For instance, you might do something such as this, blurring the area behind so that you see it as shapes.


Or it can be helpful to do a drawing from a complex photo that reduces the tangles to areas of value and patterns, so if you have time this week you might try a pencil drawing such as the one below to help you see the areas of complexity as values and shapes only. Bring the drawing(s) along with your photo(s).


Any kind or size paper is fine with me, but I always think it's a good idea to consider the amount of information in the painting and how you plan to paint it, and then choose the size of the paper to suit it. It can be hard to cram a lot of background shapes onto an 8x10" paper, so choose accordingly. 

Bring your night paintings done last week to show, as usual. I want to talk about the night paintings, and see the results on the black boards you made.

See you on Thursday,
Deborah