 | |
| Bosque Colors, (second pass) soft pastel, 12" x 18" Wallis paper |
Whoo hoo! Color is a blast!
Okay, I had so much fun in our class today that I couldn't wait to show you the outcome. Above is how my demonstration painting stood when we left class. Now let me show you how I got to this point, which is technically not completed, but is well on its way.
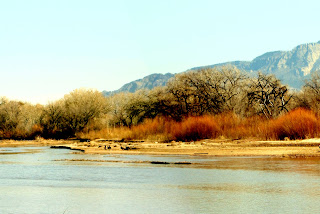
First I cut one of the grayscale photos into sections by value. (See this post for materials.) This sounds easy but people over-think it too much sometimes and make it harder. I literally use a pencil to draw an outline of the simplified value shapes, ignoring details or complex shapes, and then cut them out like a jigsaw puzzle. Then I organize them into values, grouping areas of similar value together, to arrive at 4 or 5 values. Today's photo had five values. Here's the original photograph I used:
 |
| (c) 2011 Deborah Secor (Please do not use.) |
 |
| (c) 2011 Deborah Secor (Please do not use.) |
 |
| (c) 2011 Deborah Secor |
I did something like this:
Don't get tied in knots over this part too much. I cut the photo up and taped the matching value sections on a piece of paper, grouping all the light values on one sheet, all the darks on another, etc. Then I selected each of the 5 colors. This part is so valuable and sometimes a bit challenging.
Below is a photo of one color grouping, as well as all five sheets with their value shapes taped in place (taped at the top in the first one, and on the right-hand side in all the rest of them), as well as the colors I chose. I made a little mark next to the cut-out, matching it in value as closely as possible, then used that chosen color as my benchmark. I made a long stripe of it on the paper and placed color candidates alongside, touching the two color edges to see if they were the same or similar in value. If I can't see a line dividing them they're close enough. You have to close one eye and squint like crazy, allowing your eyelashes to filter out the color, to see if they match--or you can hover your value finder over each color and make sure they're the same value that way.
 |
| Medium values |
**NB: your photo will most likely make the lights white, but go just a step darker, since nothing is as white as white.
Then tape your paper in place, and using the second grayscale photo make a quick line drawing of the shapes in charcoal. Then close your palette, place the pieces of paper with the color charts and chunks of pastels on them next to the easel and begin plugging your chosen colors into the correct areas. At first it will look like a crazy hodge-podge of colors, but don't worry, just do it. Put ALL the light colors into the light area, ALL the medium-lights into those spots, ALL the colors chosen into their appropriate areas. It will look messy and fun, something like this:
 |
| Pass 1: Plug colors into the appropriate value areas. |
You'll be much happier if you use the grayscale photo to begin with. It's hard enough to decide where the mediums reside, or where the medium-lights should be, without being driven insane looking at a color photo. You don't have those colors--and that's why this experiment is useful, so don't fight it. Go with all the crazy-fun colors, applied where they're meant to be, determined by the values.
 |
| Broken color close up. |
After you've plugged in all the colors in the value areas, and have completed one pass, so that the whole page is covered with a layer of pastels, you'll begin to paint using this very select palette of colors. Don't open up your palette and start using more colors. Only use the 20-25 colors you've specially chosen already. Do at least one more pass with them, and if you're able, I challenge you to complete the entire painting using these colors alone!
I believe this slightly frustrating, somewhat confusing, but more than worthy struggle will help you determine the value of a color, and see that you can paint a piece with a limited palette. Value is the motivating force of a painting, and color is the energy. Go on painting, layering colors, using broken color, finding nuances. Don't strictly adhere to the puzzle. After a while, you might want to begin painting from the color photo, but only use the limited palette of colors to paint. You'll be amazed. I suspect you'll be using colors you never would have chosen from the original photograph. Just let yourself enjoy the color experience.
And have fun!


I'm going to try this on the weekend. I learn so much from you. Thank you.
ReplyDeleteHow many colors will you be using? Are there several colors for each value? I found this concept to start the painting intriguing.
ReplyDeleteThanks.