 | |
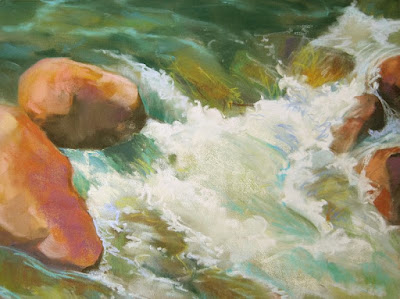
| Rushing water demo in progress, 9x12" |
To paint this effectively, remember that gravity constantly moves water to the lowest point, so first find the direction the water is moving. Then analyze what's happening under the water, which always affects what you see on top. Ask what's shaping the water: a large boulder, a crevice between two or more rocks, a sandy beach, a graveled pit.
Think about the volume of the water that you see. Deep water moves more sluggishly much of the time, due to its own weight. Shallower water can more easily bounce and splash over and around rocks in the rapids.
Whitewater gives the impression of movement—the more churned up, the whiter it is. I suggest you start with darker colors beneath to establish what is affecting the shapes of the moving water before adding lighter colors. Put pure white away until the very end. Whitewater becomes opaque, which means that unlike clear water it tends to cast shadows, and shows shadows cast on it, too. This adds to the impression of depth, mass and volume in your painting.
Use different strokes to add rhythm. Find a characteristic stroke, but vary it slightly in
direction or gesture. Repeated identical strokes become a dull pattern that is NOT
rhythmic. Varying textures also makes the water more believable. Use the haiku principle. A simple and stylized impression that's brief but
powerful will have more visual impact than excessive detailing.
It's also a good idea to analyze whether your composition will be best expressed in a horizontal or vertical format. Horizontal gives a low, swinging style, while vertical gives dramatic drops. You might consider exaggerating this for effect, perhaps using a long, narrow sheet of paper.Consider different colored ground, as well. An overall color commitment unifies a painting oftentimes, while using strongly contrasting or complementary colors can give some *pop* to the view.
I hope you have fun painting this energetic and lively subject.
Keep going, gang!
Deborah
